When it comes to photo editing, all you really need is Adobe Lightroom.
If you told me 10 years ago that I would make a post that said that, I would have laughed in your face.
For ages, I was a Photoshop snob. Lightroom was the inferior cousin that couldn’t do any heavy lifting. Now, it’s pretty much all I use to edit my photos.
If you don’t have Lightroom yet, you can get it here. it’s well worth the $10/month. Plus, you get Photoshop included when you sign up.
How to add pop and pizzazz to your photos using Lightroom
Lightroom has infinite power and potential – and it’s super easy to use. The video below will give you a high-level overview of some of the most important sliders and adjustments you can use to improve your photos in seconds.
It includes a demo of me editing a collection of travel photos while sharing memories from the adventures.
If you want to see more, the video is a part of my online course – From Taking Photos to Making Memories.
Improve your photos in 30 seconds using Lightroom
There are infinite was to use Lightroom to create your own photo style. The best way to get started is to just open it up and play around.
When you edit in Lightroom, you’re not actually changing your photos until you export them. That means that whatever you do, you can always undo.
Here is my go-to Lightroom workflow:
- Adjust exposure as needed
- Bump up the shadows
- Compensate by bringing down the highlights
- Add a little contrast
- Add in some texture
- Add in vibrance as needed
- Toss around a vignette (found under “effects”)
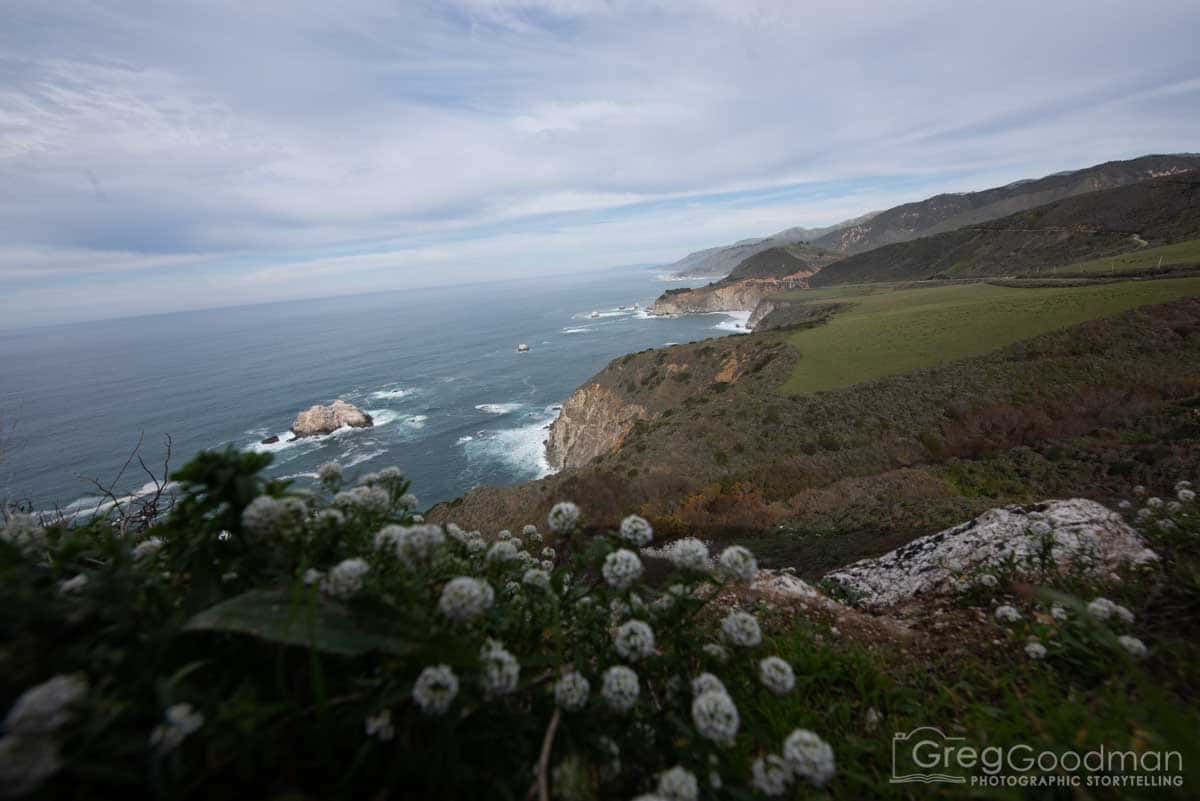
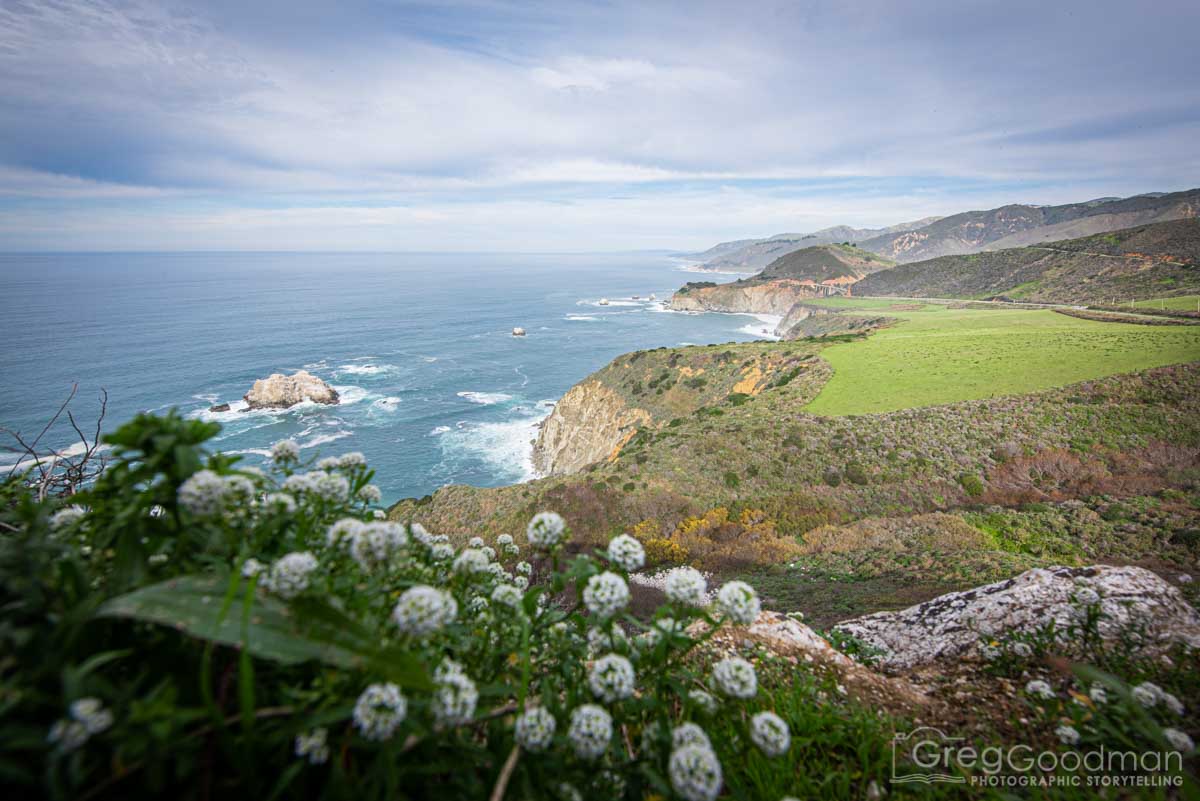
To see what that all looks like, use the slider below to check out a before/after sample. Then, if you haven’t watched the video, scroll up … it shows you exactly how I made the edits in Lightroom.
EXPLORE SOMEWHERE NEW


BUY A PRINT
All photos on this site are available as limited edition fine art photographic prints. Please get in touch for sizes and rates.